Inventory Tips For Your Business
Inventory is the center of your business. Without it, you couldn’t make a gift basket BUT this is the one area where your budget can be hurt the most.
You have to rein in that desire to buy every “cute little thing” that you see that could “add just the perfect touch to a particular basket.”
The first secret to staying within a budget while building your inventory is to create a plan. The first decision is not what baskets you are going to offer but that very first decision is WHO IS YOUR TARGET MARKET. What group of people will you be selling to first?
Remember that you can’t be everything to everybody.
And you also can’t offer everything to that target market — not in the beginning, anyway.
Decide what kind of basket that target market will want and need.
Gourmet gift baskets are probably the easiest to start with. One thing that many in this industry tend to not understand is that gourmet means different things to different people. The word gourmet means simply “good food.”
Since gourmet gift baskets are what most new to the industry start with, this is the area that I am going to discuss.
Plan a generic gourmet gift basket. You can then use labels, gift wrap, and all sorts of other inexpensive things to actually theme this basket for a particular occasion or industry.
Start small with your inventory. If you haven’t made any sales yet, you probably want to buy locally and buy retail. Buying by the case will be cheaper per item but you may end up with lots of products that expire and can’t be used so in the long run may be more expensive. But even when buying retail, you can stretch your dollars by shopping carefully.
Here are some tips to help you do exactly that:
1. Containers:
You don’t need a lot of different containers. Start with just one or two basic baskets. Baskets without handles are usually cheaper to buy and cheaper to ship. You will find that most of your customers aren’t as concerned with the container as they are with the products inside and the overall impression that the gift provides.
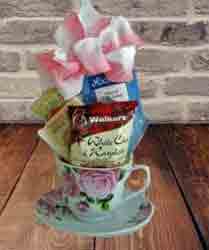 Look at options other than baskets as well. The dollar stores usually have both silver and acrylic trays that can be used to create beautiful designs for only $1.25. Tea cups and mugs also make inexpensive containers.
One of the best kept secrets as far as suppliers is Nashville Wraps. Their minimum order is only $25 and you can find all of your supplies there.
For containers, look at gift boxes or the gift basket boxes from Boxco Industries. Gift Boxes can be purchased individually while the themed Boxco Gift Basket boxes are sold in quantities of six. I have many different designs that I use the very same products in for different themes. But one way to stretch that budget a bit further is to buy one or two of the solid colored boxes and then create themed labels to glue onto the front.
Now that gifts placed flat in a gift box is the latest trend, you can find suitable boxes that are inexpensive.
And the most inexpensive container is “no container at all.” Simply use a one of your gifts that is packaged in a flat container — such as a box of chocolates or cookies — and build your design on top of it.
2. Wraps and ribbons
Nashville Wraps is the secret here as well. Buy a roll of 20″ cello, a roll of curling ribbon to tie the top of your cello, and 2-3 rolls of ribbon. If you haven’t learned how to tie a bow yet, there are some videos on Nashville Wraps’ blog and Youtube. There is also an article on this website called “How to Make a Bow” that you can learn from.. Pull bows, which are also available on their site, are another option.
3. Filler
For trays, you won’t need filler since you will create the design directly onto the tray. For baskets, however, you will need something to go inside before adding your products so that the products don’t sink into the basket.
The base can be created a number of different ways. Ends of unprinted newsprint rolls can sometimes be purchased from your local newspaper. Brown packing paper is another option. Some use peanuts placed inside a plastic bag. When in a pinch, I use is something that most gift basket people frown upon but it works well for me. I place a couple pieces of tissue inside the basket with the ends hanging out over the sides, then wad up printed newspapers and place inside the tissue. The ends of the tissue are then folded over the top. If needed I will fold another piece of tissue to go over the top. Then I add my shred on top of that.
Shred is that curly stuff that is used to finish the base. You can buy it in 25 pound boxes from Nashville Wraps but if you are just starting out, you can also buy 8 ounce bags of shred . You don’t need all kinds of colors. One generic color will work just fine for all your designs.
Another secret technique that will save you money is that when you use shred, use your hands to stretch it out as it comes all wadded up into a tight package. It will go a whole lot further, fill more baskets, and stretch your budget.
4. Products
This is probably what you have been most anxious about and is the one area that can destroy your budget. In the beginning, buy just a few products. Many beginners think that they need different products for every design. YOU DON’T. With a few products, you can create any number of designs. If you want a theme or different color, wrap a product in gift wrap. Gold gift wrap on a box of cookies from the dollar store can be an awesome addition to a gift.
Don’t buy by the case in the beginning. Buy local until you’ve made sales.
This next statement will be heresy to many in the industry but is something that almost all of us do. Check out your dollar stores, your Costco or Sam’s Club, and even your closeout stores like Ross and Tuesday Morning. Look for quality, good size packages for the money, expiration dates, and price. You’ll find many of the same products that you can order wholesale by the case at these stores for less than you would pay wholesale. And no shipping. This is also a good way to test products before buying a whole case.
If you are planning to do gift baskets themed for your local area or region, craft shows are good places to find potential products that you can use. For example, in my area I found candles made from limbs of local aspen trees. Another item was notecards of watercolor paintings of local scenery that I bought inexpensive frames for and used in my local themed baskets. Use your imagination always shop with new eyes open to possibilities.
Fillers for your gift baskets can be created inexpensively as well. If your style uses floral and greenery as enhancements in the baskets or added to the bow, cut strands and stems apart and use separately. Use labels and gift wrap. Pillow boxes and even small gift boxes can be filled with wrapped candy, nuts, cookies, and other products that you buy in bulk. If the bulk products are not individually wrapped, you may need a Kitchen Handler’s permit from you health department to repackage. If you have that permit and are allowed to do so by your health department, you can create all kinds of “private labeled” products with your own unique label.
When you get those orders flowing, you will then want to buy by the case either directly from the manufacturer or from a distributor. If you aren’t familiar with a product, you can ask the opinion of others who have used it before on our facebook group. If you aren’t already a part of that, you should be. It’s another free resource.
But whether you are just starting your business or have an existing one, it is essential to watch those inventory dollars and stretch them as much as possible.